Part 1 - Modelling the hand
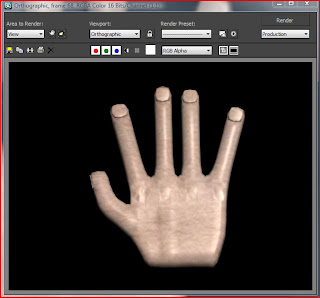
The first and main part was to create the hand, for this I started off with a square from which I extruded 4 fingers adding intersections at each joint. After the fingers were at the right length I used the vertices selection and scale tool to get the right width, once the fingers had the right scale it was a matter of angling them in the right direction. Once the fingers were complete I had to add the thumb, this had the same technique except the thumb was made at the side with some rotation during the extruding process. With the fingers and thumb complete it was just a matter of adding the finger nail and some shape to the hand. To add the finger nails the end section of the finger was highlighted, once highlighted it was then beveled inwards and brought backwards slightly into the finger, pulled up and made into an extruded part of the finger. Once this was done on each finger the ends could be rounded. This was done by selecting the two edges on each finger and connecting them, this made a selectable edge at the front of the finger from which I could pull out and get roundness. The last part to the shape of the hand was to add realistic shaping, such as knuckles and palms, to add the knuckles I simply selected the vertices by each finger and raised them up, the same was done to add roundness to the palms.
Part 2 - UVW mapping - New Technique
So the shape of the hand was complete, next up was the texturing of it. For this I was going to be UVW mapping. First of all I split the hand into two sections, the top half and the bottom half, as the hand was only going to be seen from the top I was only mapping the top half. I had applied the unwrap UVW modifier before selecting the face in the select face option in UVW mapping. I then clicked the edit button which brought up a new window, it came up with the hand selection along with many other lines, to get rid of the lines I didn't need I clicked the planar map button on the UVW sidebar, with the overlapped edges highlighted it was getting to work and moving the vertices so there weren't any over lapping, this took time as I would have to keep switching between vertices mode and faces mode and selecting inverted edges. Once the mapping was complete the skin material stretched over and did not look distorted in anyway. As you can see in the print screen the skin has not been mapped at the bottom but as I say this does not matter as we do not plan to show the palm of the hand in the animation.
Part 3 - Adding Bones - New Technique
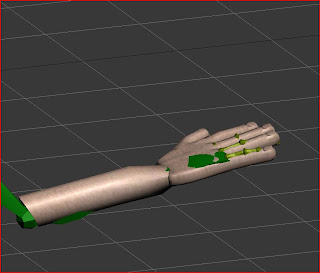
Adding the bones was something I was not sure about, I had to research how to do it and decided that rather than drawing my own bones in place on the hand I would use the preset biped which is in the software. The biped is editable so I started off by lining the palm of the biped with the palm of the hand I created, I had to scale it so the fingers would come out at the right points, I then added the fingers which I did on the biped menu at the side you click up or down for the number you want. I had the fingers added and again I had to line them up so they fit in the fingers. Once I had the fingers in line I had to bind the hand with the biped. To do this I had to add a skin modifier, with the skin modifier I had to select which bone would link with what part, I connected the hand to the palm and finger bones. I had to adjust the bone envelopes so they would not overlap and move the other fingers. With all the bones in place and bound to the hand I could then move the hand.
Here is the hand with the biped.
As you can see the biped sticks out over the skin but when it comes to the final video the biped will be hidden.
Here is some basic animation of the arm with the finger movement.


No comments:
Post a Comment