Friday, 6 January 2012
Adding Materials
Adding the materials was a task I left to the end once I had created all of the furniture for the guildhall. I started by making a material for the toilet suite which I applied to the toilet and the sink, this had the look of shiny white ceramic. I also made a bin which was in the toilet and made it chrome, to make the chrome material I selected the diffuse colour as a grey and set the specular to 101 and glossiness to 57 it was finished off by adding a ray-trace in the reflection map. I also made steel which had slight alterations in the specifications. I applied wood to the furniture by downloading a wood image, and applying it to the material, with some of the furniture the wood material had to be tiled to add a more realistic look.

Creating the hand for animation
Since we found out that Jack had dropped out from the group I am now responsible for creating the hand. I had a first attempt of my own but soon realised my knowledge of 3Ds max was not enough to create a hand from scratch, realising this I sought a tutorial.
Part 1 - Modelling the hand
The first and main part was to create the hand, for this I started off with a square from which I extruded 4 fingers adding intersections at each joint. After the fingers were at the right length I used the vertices selection and scale tool to get the right width, once the fingers had the right scale it was a matter of angling them in the right direction. Once the fingers were complete I had to add the thumb, this had the same technique except the thumb was made at the side with some rotation during the extruding process. With the fingers and thumb complete it was just a matter of adding the finger nail and some shape to the hand. To add the finger nails the end section of the finger was highlighted, once highlighted it was then beveled inwards and brought backwards slightly into the finger, pulled up and made into an extruded part of the finger. Once this was done on each finger the ends could be rounded. This was done by selecting the two edges on each finger and connecting them, this made a selectable edge at the front of the finger from which I could pull out and get roundness. The last part to the shape of the hand was to add realistic shaping, such as knuckles and palms, to add the knuckles I simply selected the vertices by each finger and raised them up, the same was done to add roundness to the palms.
Part 2 - UVW mapping - New Technique
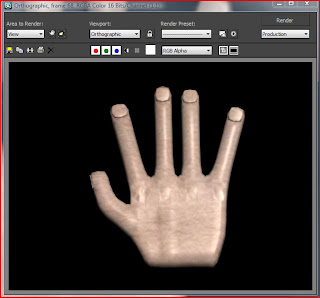
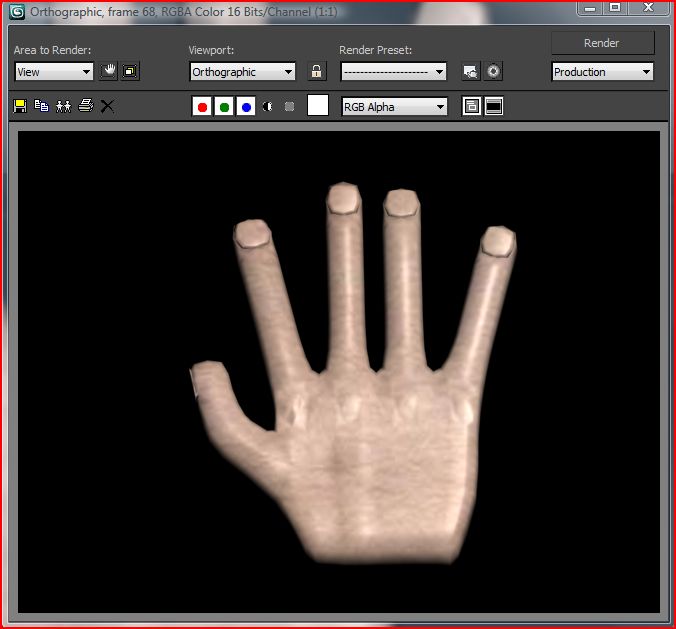
So the shape of the hand was complete, next up was the texturing of it. For this I was going to be UVW mapping. First of all I split the hand into two sections, the top half and the bottom half, as the hand was only going to be seen from the top I was only mapping the top half. I had applied the unwrap UVW modifier before selecting the face in the select face option in UVW mapping. I then clicked the edit button which brought up a new window, it came up with the hand selection along with many other lines, to get rid of the lines I didn't need I clicked the planar map button on the UVW sidebar, with the overlapped edges highlighted it was getting to work and moving the vertices so there weren't any over lapping, this took time as I would have to keep switching between vertices mode and faces mode and selecting inverted edges. Once the mapping was complete the skin material stretched over and did not look distorted in anyway. As you can see in the print screen the skin has not been mapped at the bottom but as I say this does not matter as we do not plan to show the palm of the hand in the animation.
Part 1 - Modelling the hand
The first and main part was to create the hand, for this I started off with a square from which I extruded 4 fingers adding intersections at each joint. After the fingers were at the right length I used the vertices selection and scale tool to get the right width, once the fingers had the right scale it was a matter of angling them in the right direction. Once the fingers were complete I had to add the thumb, this had the same technique except the thumb was made at the side with some rotation during the extruding process. With the fingers and thumb complete it was just a matter of adding the finger nail and some shape to the hand. To add the finger nails the end section of the finger was highlighted, once highlighted it was then beveled inwards and brought backwards slightly into the finger, pulled up and made into an extruded part of the finger. Once this was done on each finger the ends could be rounded. This was done by selecting the two edges on each finger and connecting them, this made a selectable edge at the front of the finger from which I could pull out and get roundness. The last part to the shape of the hand was to add realistic shaping, such as knuckles and palms, to add the knuckles I simply selected the vertices by each finger and raised them up, the same was done to add roundness to the palms.
Part 2 - UVW mapping - New Technique
So the shape of the hand was complete, next up was the texturing of it. For this I was going to be UVW mapping. First of all I split the hand into two sections, the top half and the bottom half, as the hand was only going to be seen from the top I was only mapping the top half. I had applied the unwrap UVW modifier before selecting the face in the select face option in UVW mapping. I then clicked the edit button which brought up a new window, it came up with the hand selection along with many other lines, to get rid of the lines I didn't need I clicked the planar map button on the UVW sidebar, with the overlapped edges highlighted it was getting to work and moving the vertices so there weren't any over lapping, this took time as I would have to keep switching between vertices mode and faces mode and selecting inverted edges. Once the mapping was complete the skin material stretched over and did not look distorted in anyway. As you can see in the print screen the skin has not been mapped at the bottom but as I say this does not matter as we do not plan to show the palm of the hand in the animation.
Part 3 - Adding Bones - New Technique
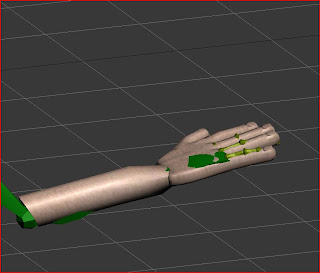
Adding the bones was something I was not sure about, I had to research how to do it and decided that rather than drawing my own bones in place on the hand I would use the preset biped which is in the software. The biped is editable so I started off by lining the palm of the biped with the palm of the hand I created, I had to scale it so the fingers would come out at the right points, I then added the fingers which I did on the biped menu at the side you click up or down for the number you want. I had the fingers added and again I had to line them up so they fit in the fingers. Once I had the fingers in line I had to bind the hand with the biped. To do this I had to add a skin modifier, with the skin modifier I had to select which bone would link with what part, I connected the hand to the palm and finger bones. I had to adjust the bone envelopes so they would not overlap and move the other fingers. With all the bones in place and bound to the hand I could then move the hand.
Here is the hand with the biped.

As you can see the biped sticks out over the skin but when it comes to the final video the biped will be hidden.
Here is some basic animation of the arm with the finger movement.
Kitchen
I have created the kitchen which was the most enjoyable part of modelling for me, although they were relatively simple to create I enjoyed seeing the finished result. To create the kitchen cabinets I started off with a box and extruded each side for extra length, I made a handle and added an overlap for the work top, the middle unit is the cooker which I have extruded inwards and added hobs on the top. Handles were added to the cabinets as well as the sink on top of one of the units.
Here is the model of the units in the final video render,

There is also a screen shot showing the cooker in more detail

Library

The library is the room with the room with the most furnishings:
Chair
Bookcase
Lamp
Computer and screen
Table
Rug
The first thing I made was the chair. To create the chair I used the line tool to draw the shape of the arms which I could then make by using the loft tool. To this I added the bottom strut as well as the seating connecting the arms. This technique was one I learnt earlier in the module.
This screenshot shows the shape of the chair.

After creating the chair my attention turned to the bookcase, I decided to create it by using boxes so it simple consists of boxes joined together.

Lamp
In the library there is a lamp that will sit on the desk, to create the top shade of the lamp I drew a line and created a cup shape using the lathe modifier, the stand was simply a cylinder with a lofted line to make the stem.

Computer and screen
Next to create for the library is the computer, first of all I started by making the screen for the computer. To create the screen I made a box and chamfered the edges, I then went into editable poly mode and highlighted the front face and extruded it inwards to indent the screen area.
Here is what the screen model looks like

Next to the screen you can see the computer base, again this started of as a square, I extruded part of the front inwards for the CD tray and added a button.
A rendered copy of the Computer in the guildhall.

Table
The table/desk for the library was simple to create, I used a cylinder for the table surface which I made longer by extruding the centre, I then added cylinder legs and a base to the legs.

Rug
The rug was simple to create, I got an image of a rug and made a plane the size of the image, I used it as a material to apply to the plane.
Museum exhibition cabinets
I have a rendered a copy of the cabinets

This screenshot shows the glass plane that is placed on the cabinets. To create the glass material I made the material around 90 on the transparency, I increased the specular level to make the glass have a dynamic look. In the maps I added a ray-trace to the reflection map which gives the glass the realistic look.
Shop and main entrance in the final video
I have rendered a screenshot of what the shop counter will look like when it features during the final production.

As you can see I have placed the Finchingfield plaque to add more interest when people walk in. In the bottom of the shot you can see a small table which will have leaflets placed on it.
Wednesday, 14 December 2011
Shop Shelving

From the final production I have taken a screenshot of what the shelving looks like when it is placed in the shop. I particularly like the wood I used for the material. I applied a chrome metal to the legs which compliments the wood.

Subscribe to:
Posts (Atom)